Frequently Asked Questions (FAQ)
Q: The stage is stalling or slipping.
Check that the movement is not obstructed by anything. If the LED indicator on some of the stages turns blue, it means that it is in installed mode. Try unplugging and plugging in the stage power source. If the problem still persists it could be that the stage is under a too-heavy load, try lowering the stage's speed or maximum speed at Settings > Stage > Stage speed, Stage max speed, or changing the stage physical configuration. If all else fails, you might need to use a stronger version of the stage, such as LSM-150A More stage's troubleshooting instructions can be found here Troubleshooting X-series motion devices
Q: The stage moves too fast or too slow.
The stage's movement speed can be set at Settings > Stage > Stage speed, there you can set both the normal movement speed and the slow movement speed (used when moving while holding Shift key) as well as their units.
Q: The stage moves too far or too short.
- First, make sure you have homed the stage the first time you are using it by going to Settings > Stage > Home stage on startup

then reconnect the stage by clicking the Stage button to turn red and then click again to turn green
  , all the X, Y, and Z stages will the move to its zero position.
 - After homing the stage, or if the stage was already homed, set the stage limit to your desired distance by going to Settings > Stage > Stage Limit

the numbers are in X, Y, and Z order. Afterward, close the settings, and reconnect the stage again by clicking the Stage button off and on
  .
.
It is crucial that you set the stage Z limit such that your objective lens does not go too far down and collide with your plate or subject and break it (we have learned this the hard way).
Q: The stage moves unintuitively.
- Make sure to calibrate the camera and stage relationship by clicking the Calibrate button, then the Camera & Stage Calibration tab. This estimates the similarity transformation between the two. See the estimated result plot and decide if it's accurate to your setup or not. If not, try changing the object to something with a clearer structure in the field of view.
- After calibrating the transformation, turn on the move in image space mode' option in Settings > Stage > Move in image space mode.

Q: The camera is completely black.
Here are a couple of things to try:
- Increase camera exposure
- Increase camera gain
- Lower up or raise the stage
Q: The dual-color calibration is not perfectly aligned.
Depending on your optics configuration, it can be quite hard to have a similar-structure image showing up on both sides of the dual-color image, which is important for the calibration algorithm. Try finding a fluorescent object that shows patterns on both sides. Sometimes we found that calibrating on the animal itself can also give a great result. But if all else fails or you want a perfect pixel alignment, you can manually adjust the translation and rotation parameters in Settings > DualColor > Translation X, Translation Y, and Rotation.
Q: The tracking doesn’t work.
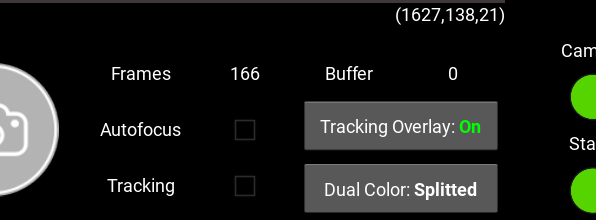
Turn on the tracking overlay feature by clicking the button Tracking Overlay button in the lower right corner of the GUI. This feature will draw the tracking boarder on top of the displaying image, as well as the thesholded image rendered on top in transparent blue. This will help you identify how the tracking algorithm sees the image and give feedback on how much you should adjust your settings such as exposure and gain, or the tracking ROI to cover your subject.
